Wednesday, May 28, 2008

Reports of my death have been greatly exaggerated

Having not posted anything in nearly one year, it seems an appropriate time for an update.

I've nearly finished all of my projects. The boat is repainted and the boat has been mostly reassembled.

For completeness I will run through the projects that have been completed since I last posted:

Reinstalling the Cabin Sole
The top fiberglass "skin" of the cabin sole was fastened onto the new balsa core with a ketchup consistency mixture of epoxy and colloidal silica. The fiberglass was held in place with many, many sand bags and a few bags of concrete. I am guessing that I put between 350 and 400 pounds of weight on the floor. Seams were faired with a frosting consistency mixture of epoxy and West System Microlight 410. I couldn't be happier with the way this turned out. The floor is super solid now and looks great. I painted the sole with the same Interdeck nonskid that is on the decks. I can't seem to find all of the photos of this process.


Hatch Repair
The forward hatch was cracked in the middle of its forward edge. I decided to put a fiberglass "band-aid" on top of this area. The repair is mostly cosmetic, but should add a bit of strength. I decided to reinforce the back edge in the same manner. Around four layers of fiberglass were applied (each piece successively larger, see Don Casey's books for more info). The repair was faired into the rest of the hatch and the area was sanded.


Deck Repair

I found a bad spot on the starboard side around the forward portion of jib track. There were a couple of leaking pieces of hardware there and that had ruined the core. I found the extent of the rot by drilling holes outward from the bad region, I then cut the top portion of fiberglass off and dug out the bad wood. New balsa core was epoxied in place. I then layed up a new fiberglass deck in this area. This was my first experience with fiberglass and I didn't find it to be too challenging. As with everything the key is good preparation. I did many layers, many more than I thought would be necessary. It should be very strong here.


Painting


The entire painting process took forever. It is an endless cycle of sanding, sanding, cleaning, painting, sanding, sanding, painting... ad infinitum. I put on two coats of primer, three coats of Brightsides, and two coats of Interdeck. I used the "roll and tip" method for the Brightsides and got a reasonably shiny finish, there are many many variables in getting a good finish but the most important are: substrate preparation (sand and clean) and the paint/thinner mix:

Masking out the non-skid areas was a very tedious task. I didn't get it exactly perfect, but I think it looks respectable. I got some vinyl fine-line tape from an automotive store and outlined all the non-skid areas. I then masked out the rest of the exterior with normal blue painter's tape. Corners were radiused by tracing a quarter and cutting the tape, an idea I borrowed from Tim's excellent restoration of Glissando.

So, that was painting. I don't think I've ever been so happy to be done with something. It looks pretty good, but the true test will be to see how it holds up. I wouldn't do this again if I didn't have access to an indoor painting facility. It took forever because I was a limited by weather. Warm enough to paint = warm enough for copious amounts of insects here in the South.

Putting it back together
I first reinstalled the windows. I spent a long time cleaning these up in my shop. The aluminum frames are not in too bad shape, pitted here and there but in decent condition. I used a synthetic steel wool (real steel will leave deposits that will rust) and aluminum polish to make them shiny. I used 3M 4200 to bed them back in their openings; the frames were tightened just enough to make the 4200 ooze out. After the sealant had cured for a few days the frames were tightened fully.

This is essentially the process for the entire deck, rebed the equipment in sealant, snug them down, wait for the sealant to cure and then crank the hardware down tight. After the deck had been painted it was impossible to see where the hardware was previously installed from above. In some cases I drilled a small pilot from underneath to locate the hardware. I consulted photos of the rigged cockpit I had taken previously just to make sure things were going where they belonged.

There weren't any real surprises throughout the deck rebuilding process. The only problem is that it is mostly a two person job, one on the bolt and one on the nut. In some cases small pieces of hardware were previously installed with screws. I have replaced all of these with bolts all the way through. Backing plates were installed on some hardware and very wide washers on others.

A point of interest is the new mast step/organizer plate combo that I got from Rudy at D&R Marine. I bought the new SS tabernacle to replace the original cast aluminum piece. The original used one large bolt through the center of the cabin roof with two screws to hold it in place. At some point in this boats life the screws had been replaced and three medium sized bolts held it in place. It was not a pretty setup as the bolts went through the cabin top at an angle and had broken the headliner. The new tabernacle uses four bolts. Unfortunately the bolt patterns for the halyard organizer plate and the tabernacle didn't line up. Three drill bits and a lot of cursing later I had the two pieces mated. Additionally, the tabernacle pin on the mast had to be relocated to accommodate the new equipment. Drilling this hole was nerve wracking and I spent a lot of time measuring and remeasuring prior. Getting the alignment right for the tabernacle itself was equally critical and challenging. Boats this old have changed a lot over time and are twisted, warped and contorted in subtle but important ways. In my case the headliner centerline and the boat's true center were not perfectly aligned, this makes the measurement process tricky. In the end, it went in beautifully and I am really proud of it.


The cabin was also reassembled. To my happy surprise the compression post went back in nice and snug (after jacking the cabin roof up about a quarter of an inch). Unfortunately, during this process I managed to put a crack in the floor. It is along an area that has no core and will not receive any weight. This is going to have to wait to get fixed. Disappointing, but it is hardly noticeable and should not affect on the structural integrity of the cabin floor. I then set about reinstalling the bulkheads and putting the galley back together.

I think that I can get the boat ready to sail in one more push. There is only one somewhat major piece of hardware to reinstall: the stemhead. This has a challenging aspect to it that I will describe soon. Other than that it is mainly cosmetic stuff inside the cabin and a few odds and ends like the compass and some cam cleats. In a fit of frustration I also pulled all of the electronics out and bought a new battery. I am going to redo this at my leisure as lights aren't required on a vessel this size anyway.

So, that's it. It's nearly time to go sailing.

Saturday, June 23, 2007

A lot of work done

I have been spending way more time working on the boat than blogging about it, but since it is raining I will post an update. I don't know where to start, but here is a quick summary of what has been done since the last post:

* cabin sole close to completion: new balsa core installed, fiberglass skin installed, seams glassed, currently fairing the seams
* starboard deck repair completed and faired.
* entire deck faired with epoxy fairing compound.
* rubrail removed, insert soaked in cleaning solution (hot water and Simple Green), insert scrubbed with synthetic steel wool
* cockpit sole issue addressed: core gone here too (didn't know that); not going to replace it b/c I want to sail, instead I drilled many holes and injected epoxy, faired these repairs flush
* entire boat sanded multiple times, wiped with Interlux 202 wash and primed with PreKote
* PreKote primer sanded with 150 grit, washed withe Interlux 333 and primed again
* Second coat of primer sanded again with 150 grit, wiped with 333, and the first coat of Brightsides applied.

This is where I'm at right now. Again, the weather has been my main adversary in this process. I get prepared to put the final coat of paint on and then I hear the rumble of an approaching thunderstorm. I have to wait for a weekend morning to finish the job, but the end is near! I can feel it.

Here are some pics (they were taken with my phone so they are poor quality):

The balsa core installed


The solid epoxy ring I created surrounding the inspection port. This was the source of the original water intrusion, so I made sure that wouldn't happen again

The cockpit prepared for painting. The "swiss-cheese" holes that were filled with epoxy can be seen:

The cockpit after one coat of primer

Tuesday, May 01, 2007

Finally an update

After a long hiatus from boatwork (due to the weather being too cold for epoxy to set up) I have returned and completed a lot of work. It is actually starting to look like this project may come together.

I ordered the supplies to paint the deck:

As you can see, I have chosen to use the one-part Interlux product: Brightside and its associated primers and surface prep. We are going to use Interlux Interdeck for the non-skid parts. This is a one-part polyurethane with texture already mixed in. The texture paint is beige and the other is the plain white (who knew that there were 1500 different shades of white?).

Hopefully the deck will be ready soon for the paint. They have been completely stripped of hardware (a much bigger job than I anticipated) and all the mounting holes have been 'potted' with epoxy. This is the process described by Don Casey in his book "Sailboat Hull and Deck Repair", which has become my personal bible. Essentially you remove the hardware, dig the core material out about 1/2" to 1" around the hole, fill with unthickened epoxy (to "wet it out"), drain the unthickened epoxy, inject thickened epoxy (I used West System 406 colloidal silica filler), then sand flush with the deck. Some fairing is generally required after this, I have been using the West System 410 low density fairing filler for this.

I have also sanded the entire deck with 60/80/120 grit sandpaper on my random orbital sander (thanks Courtney!) which is pretty much my favorite tool. This was a ton of very nasty work. The no-skid portions of the deck had to be completely sanded off so the paint would apply correctly. I know that some people choose not to do this, but I wanted a very finished look. Unfortunately, there is more sanding in my future because getting a mirror finish will require sanding the two coats of primer with 220 to remove any sags/drips/brushmarks. I keep reminding myself that this will all be worth it.

So, before I can paint I need to finish fairing the decks. This is mostly touch up work with the exception of one major portion on the starboard side just aft of the sidestay chainplates:
Surprise! When I was potting the mounting holes for the starboard jib sheet track I realized that a large portion of the deck was rotten. Luckily, I had a lot of leftover 3/8" scored and scrimmed balsa core material from the cabin sole replacement (pictures and narrative coming soon) so I started emergency open deck surgery. First I drilled exploratory holes radiating outwards from where I first found the rot to determine the extent of the damage. I then used my circular saw (thanks Dad!) to cut the top portion of fiberglass off. It did not come off nicely like the cabin sole, so I knew that I would now learn to fiberglass. I scraped out all of the rotten core material, sanded the repair area and sealed the edges of the good core with thickened epoxy. I cut/sanded/cut/sanded all of the balsa pieces to fit snugly in the repair area and then troweled some thickened epoxy in the repair area. The pieces fit like a glove, it is so easy to work with this balsa core material. After this had kicked I covered the entire surface of the balsa with more thickened epoxy and faired the surface. Then it was time to fiberglass. I layed down three layers (cut in increasingly larger sizes), waited for the epoxy to gel, then I layed down three more. I was using 6oz fiberglass cloth which when wetted out with epoxy becomes very, very thin. The next day I layed sanded down the repair edges to a nice bevel and layed down three more layers of fiberglass cloth. I believe that three more layers, for a total of 12, should bring the surface close to fair with the surrounding deck. It will then be faired with thickened epoxy and sanded in preparation for painting.

I have also been refinishing the exterior teak. The wood was severely weathered and the varnish, what was left of it, was flaking off. It was in horrible condition. After a ton of sanding I got the grab rails, hatch sliders, companionway sliders and toerail down to naked teak. Unfortunately, this removed a lot of wood, but not enough to significantly weaken the parts. I went to Home Depot and bought some Watco teak oil and applied three heavy coats to everything. It has been drying/soaking in for about three days now and is nearly ready for a few more coats. It looks fantastic! I think it will take around eight coats of oil in the end. What a difference:
The above picture compares a grabrail with one coat of teak oil to a bare hatch slider. The Watco gives a somewhat darker appearance then I had hoped for. I am not sure if the oil is completely to blame as 30+ years of UV exposure would certainly account for some of the darkening of the wood. At this point I am conflicted about whether I should varnish after many more coats of oil or just plan on wiping on some more teak oil on a regular basis. Most likely I will opt for the latter as I am growing tired of spending major $ and time on this project and would really like to go sailing.

I have also begun to remove the entire rubrail from the boats envelope. I have contemplated replacing the entire rail and insert (it is very weathered and brittle) but that will cost an additional $150 to $200. I think that I will just clean it up as best I can and remount it with some fresh caulk (3M fast cure 4200). Using 4200 (as opposed to 5200) will allow me to remove the rail in the future if I decide to replace it. I also intend on remounting all of the hardware with the 4200 compound (with the exception of the portlights which should be reinstalled with silicon).

I have ordered new sidestay chainplates, from D&R marine, because the existing plates were of the homegrown variety (3/8" SS eyebolts through aluminum plate backers) and I don't trust them. There are many horror stories in the OdayOwners forums about losing the stick due to failed sidestay chainplates. I also ordered a new SS mast tabernacle because the original aluminum casting is very cheap/flimsy/crap. Since I am replacing the mast step I am going to go ahead and install a halyard organizer plate underneath with the intentions of running the halyards aft to the cockpit. This will require new halyards, which the boat needs anyway (I think the existing ones are the originals and I really wouldn't like to douse my sails unintentionally!). The plate was also ordered from Rudy at D&R marine. The new mast step will be great and hopefully I can mount electrical connections directly on it as opposed to on the deck where they are easily tripped over. I am not having much luck finding a four lead deck connector though(I would like to combine the steaming and masthead lights wires into one connection).

It looks like at least another few weeks of work to get her in the water. Left to do:
*finish the starboard deck repair: more fiberglass, fairing, sanding
*complete fairing the deck
*one last sanding with 120 on the entire deck
*epoxy the top 'skin' of the cabin sole back on, fiberglass the seams, fair and sand
*remount rubrail
*paint the decks and cabin sole: prime, prime, sand, wash, paint, paint, tape off no-skid, paint, paint
*remount all deck hardware with 3M 4200 sealant: craft new SS backing plates for most hardware, drill new mounting holes, rebed the hardware, finger tighten, allow to cure, fully tighten
*install new mast step with organizer plate and electrical connections
*remount the portlights with silicon sealant
*learn how to crimp coaxial cable for the VHF antenna
*replace halyards with new all-rope halyards long enough to be led aft
*clean the hull interior and carpet the cabin walls. (this might have to wait)
*reinstall the bulkheads and cabinets in the cabin
*drop her in the water and hoist the sails!

Monday, December 04, 2006

How an O'Day Loses Its Sole

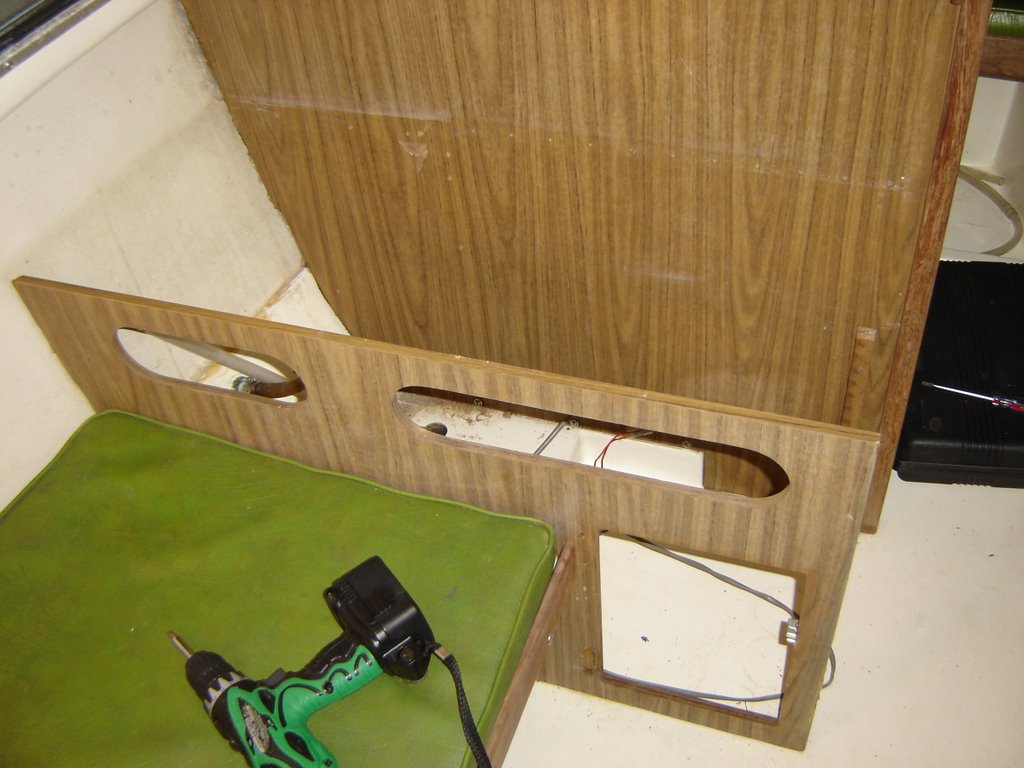
I finally started the process of repairing the cabin sole. This is necessary because the balsa core was rotten due to an unsealed cut in the floor. In order to cut the top skin of laminate off I was going to require access to the entire floor area, which meant I had to remove the galley, bulkheads and compression post. The first step was to disassemble the galley. This was an exercise in contortion.
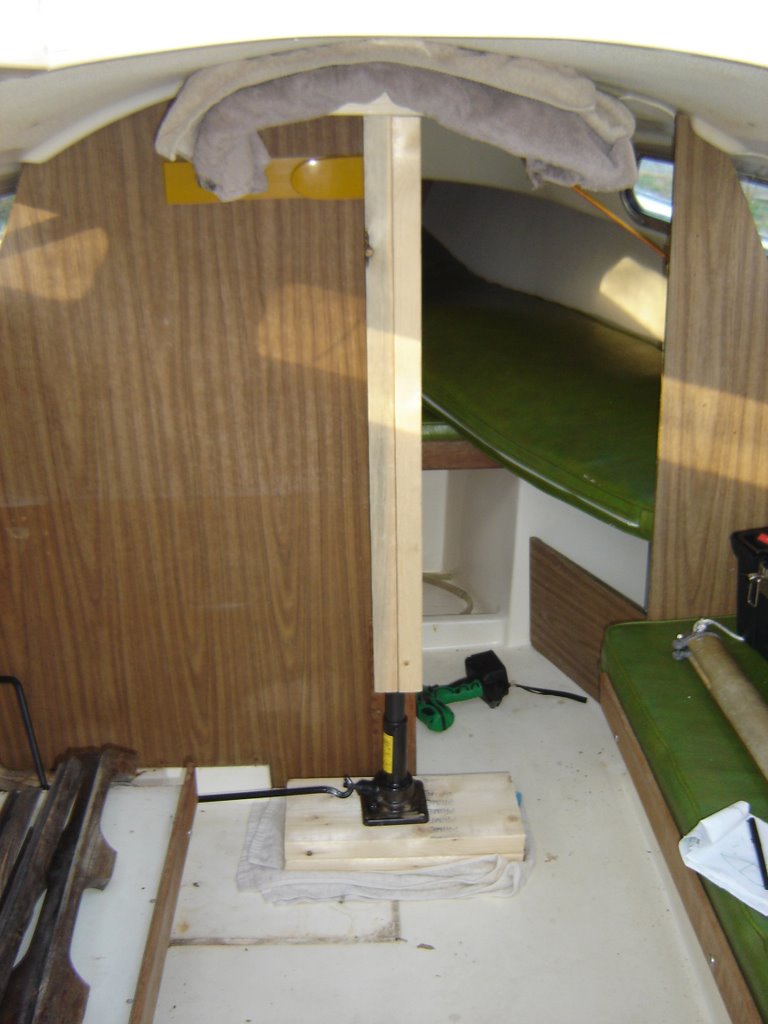
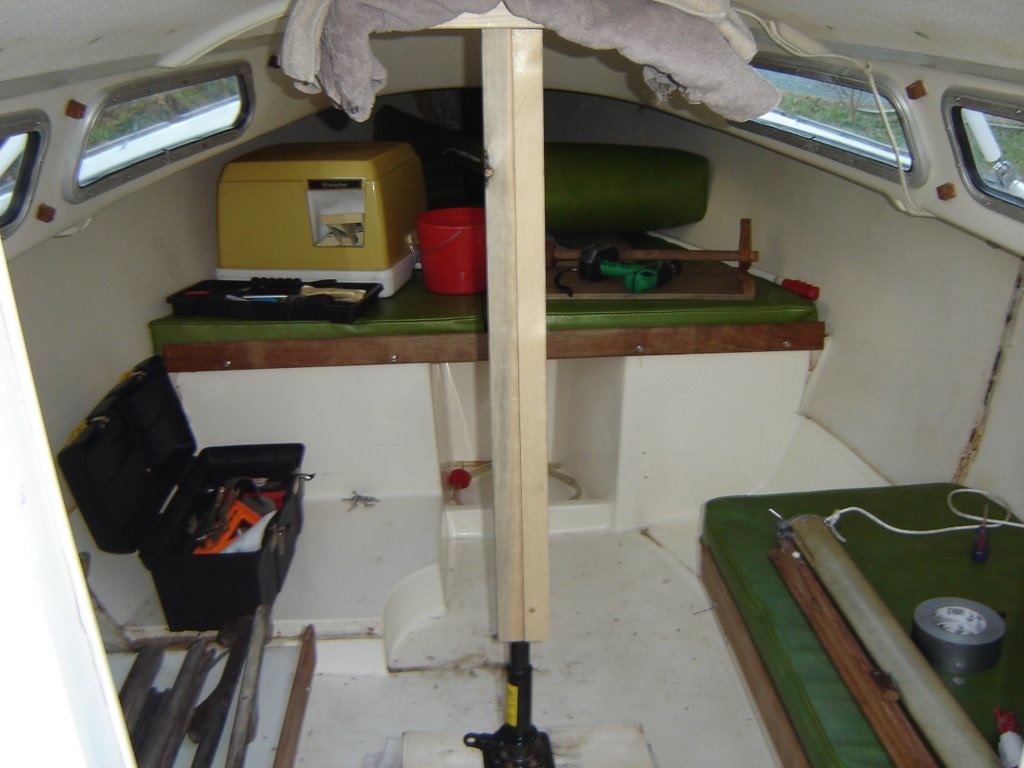
With the galley fully removed it was time to get the bulkheads and compression post out. This required the cabin roof to be jacked up slightly. I rigged a satisfactory device from a 2x4, 2x8, some towels and my truck jack.
It worked really well, and I was able to free the compression post with less than 1/2" of lifting. After removing the post I was surprised to see very little compression of the floor or roof. I would later find out that the core underneath the post was only saturated and not completely rotten. The bulkheads were removed by unbolting the chainplates and unscrewing the settees.

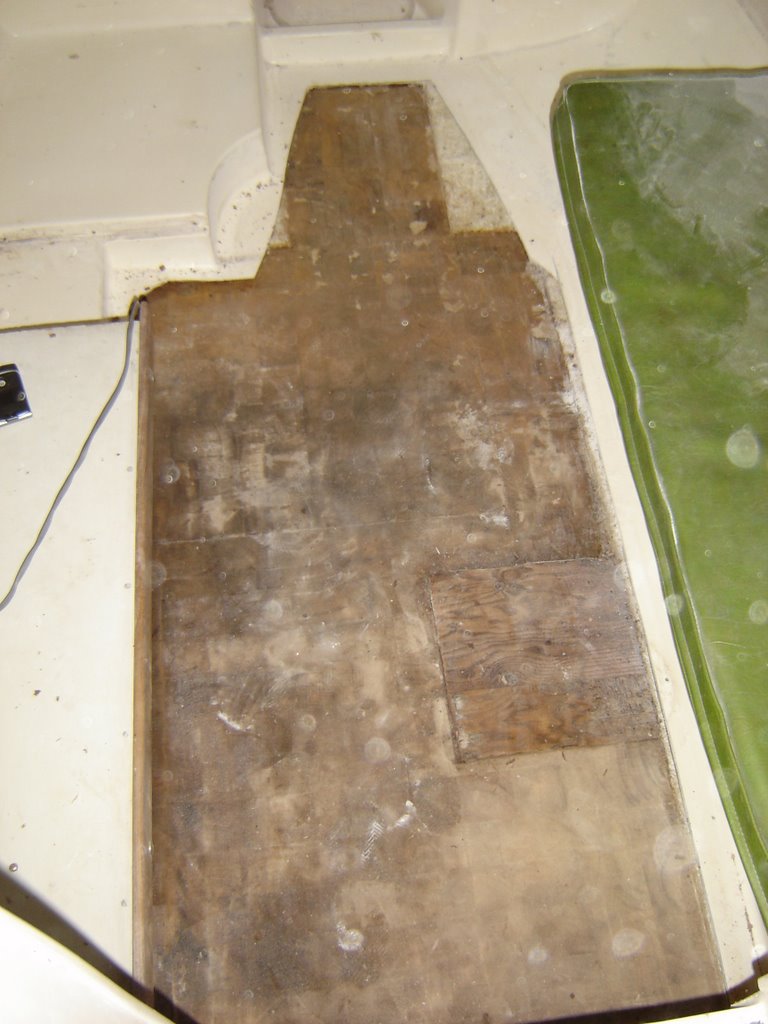
It was then time to prepare the sole for removing the top skin. I purchased a circular saw blade with the most teeth could find (155 finish blade). To prevent splintering and reduce the amount of fiberglass dust I taped the area to be cut with duct tape. I set the blade depth to about 1/2" and crossed my fingers. The circular saw did fine, but couldn't get the corners because of obstructions. I used a hand saw to deeply score the corners and then lifted the top skin off. To my happy surprise the scored corners snapped perfectly with no splintering. Now the rotten core was exposed:As you can see, much of the floor was rotten. I used a 4" putty knife to scrape the rotten core out. The only plus side of the wood being this rotten is the ease with which it comes out. Some of the core was not rotten, but all of it was completely saturated. In fact, water was splashing in my face when I hit it with the knife. It became clear that I needed to cut even more skin off, so I cut all the way forward to the vee berth and pulled this skin off. The core under this area was not rotten but soaked. It didn't come out very easy (I took this as a good sign) but I managed to pry all of it out.I was pleased to find that I had managed to get all of the wooden core out of the sole. The sole is solid fiberglass a couple of inches inward of the berths (the fiberglass can be seen in the top right portion of the above photograph). Also, it seems there is solid plywood underneath the footing for the table leg. Strange that this area (very little compressive force) would be reinforced with a solid material when underneath the compression post was not.

So, now the rotten wood is out and I am allowing the area to dry out while I track down a suitable replacement material. The original material was scored 3/8" end-grain balsa with a thin fabric backing. This material is available from a number of suppliers and it's price is comparable with the same area of 3/8" marine grade ply. I can get the plwood in town but must order the balsa core. I am also investigating the possibility of foam coring such as Divinycell. Anyway, I will post again when I have the materials and it is warm enough here in NC to cure epoxy.

Sunday, November 19, 2006

Pirate Hunting with Mikey


Sailing twice in two days! Mikey and I took the boat out to Jordan Lake again today. The conditions were a bit better than yesterday. This means that we had 3-4 knot winds for about two hours. We were able to travel under sail for about an hour and a half until everything became completely calm. Even though we didn't keep our sails full for very long we were still able to travel further on the lake than I had ever gone.
Mikey thought he saw a large Pirate ship in the distance so we went to investigate. Luckily (for them) it was a false alarm. Mikey was itching to fire our cannon. Turned out to be a large party barge (think MTV spring break). Another would be pirate ship turned out to be a loon. After the winds died down we decided to explore the lake using the iron jib. We motored out around an island and into a few coves. I scoped some nice places for Courtney and I to anchor and spend the night.


Courtney called me while we were on the lake and said that she and her friend, Katie, were on the dock waiting for us. We picked them up and went for a short ride before it got dark. The boat wasn't crowded at all with four of us in the cockpit, I was pleasantly surprised. Katie took the helm and piloted us for a while before we let the autohelm take us into the dock (well, almost all the way in). Breaking the boat down with four people is great! Everything went much quicker with four sets of hands. All in all, a great two days on the lake. Courtney and I might get to take her out once before we head to Morehead City for Cassidy's first salt water trials.

Saturday, November 18, 2006

Yachting with John

Today John and I went to Jordan Lake. I was expecting the wind to be fairly calm, but hoped for at least a constant 5mph. It was a beautiful day, about 57 degrees and partly cloudy. There were lots of fisherman out taking advantage of the weather.


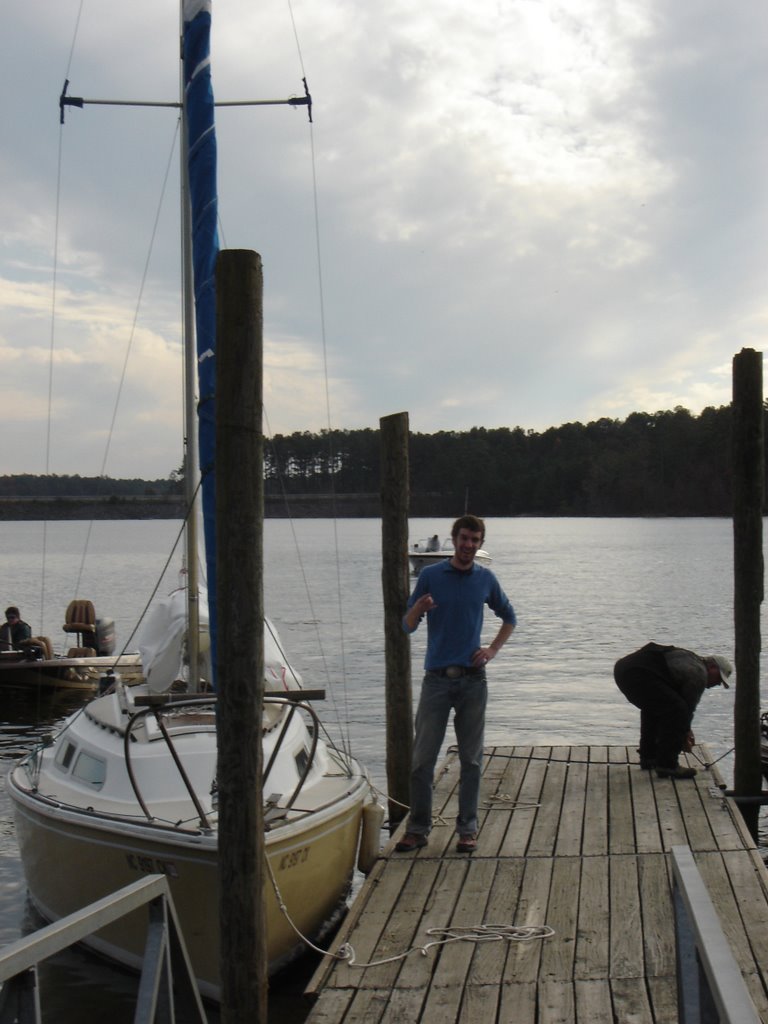
John and I stepped the mast and rigged her up in record time. She was floating in no time. Of course, as soon as we were ready to motor out, about five fishing boats lined up right behind us. No problem, just made it a bit tighter there. I think the fishing boats expect my boat to be as nimble as theirs... it is not. Anyway, we launched without managing to ram or tick off the other boaters and we were off. Motored out a bit and raised the sails. We got in the slot and were cruising at a good clip in 5-6 mph wind for about thirty or forty minutes. Then the wind completely died and the lake surface turned to glass. We decided to make the best of the situation by dropping the sails and motoring about for a while.

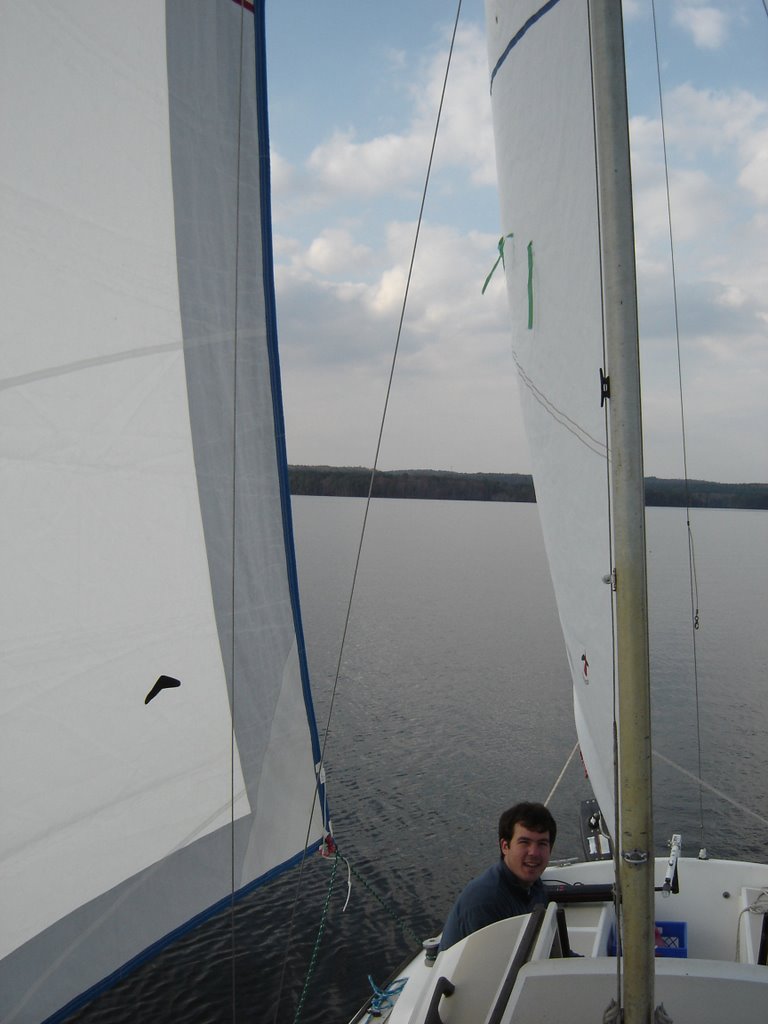
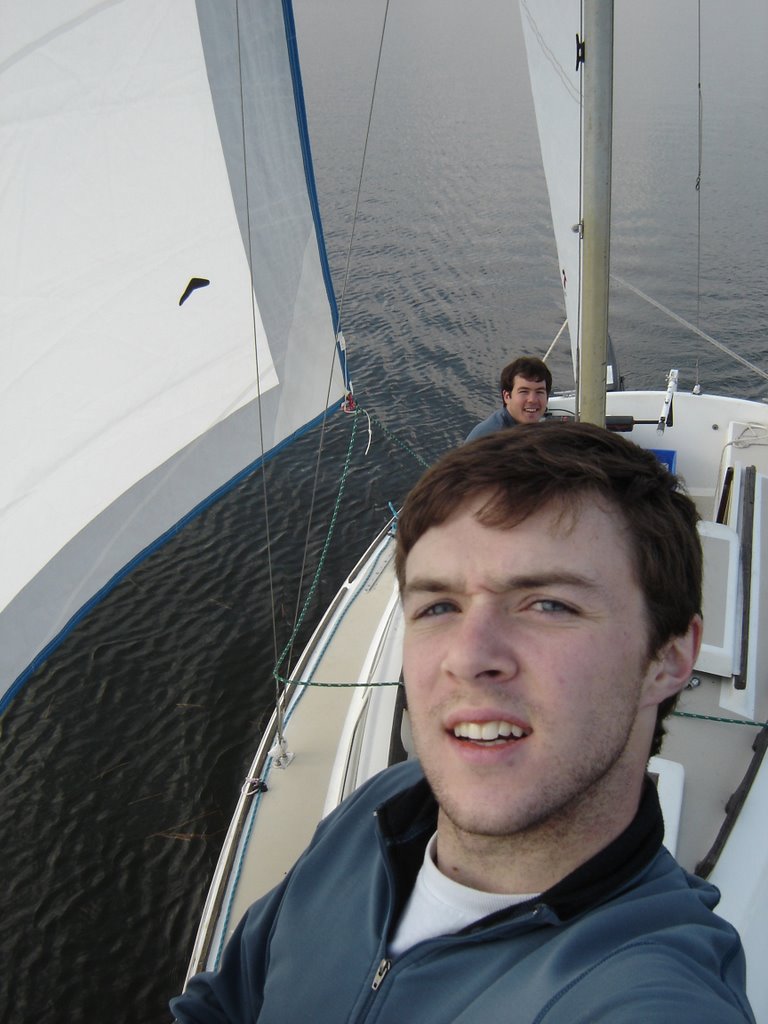
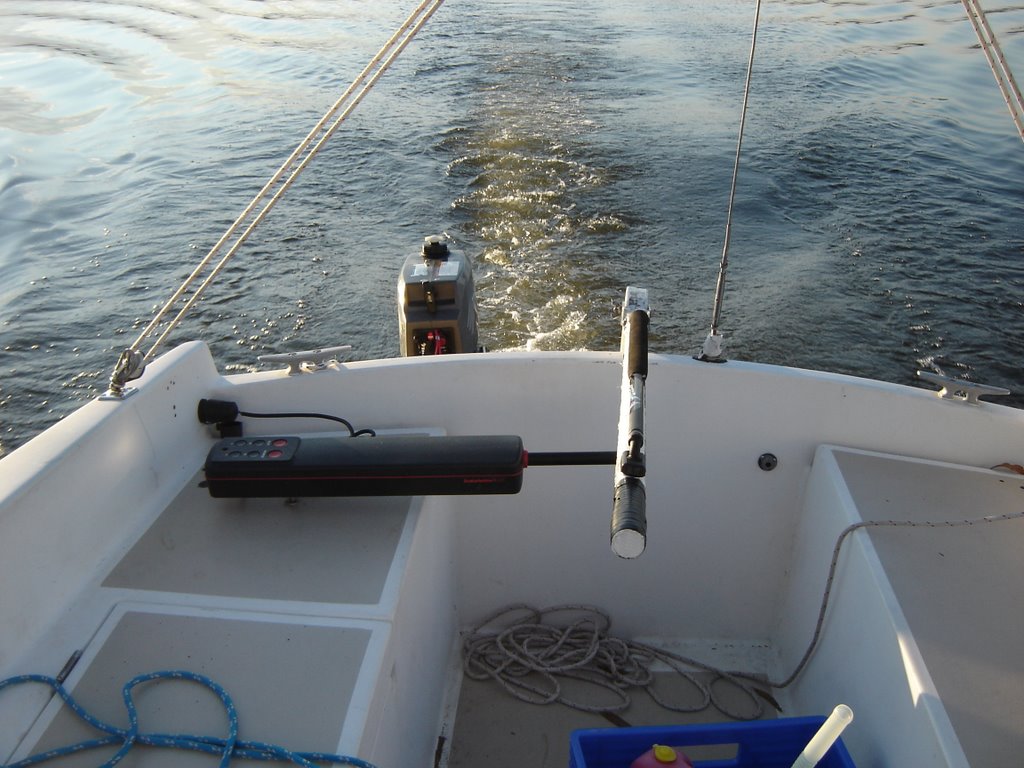
I thought it might be a good time to try out the autohelm. It worked like a charm! I don't know what I expected but this thing is a dream! We pointed her at the dock from about half a mile out and both stood on the bow as she cruised for about twenty minutes. The picture shows what a simple setup it is. The mainsheet system is also visible in this shot, it really makes for an open, uncluttered cockpit.


Wish we had better wind, but it was fun anyway. My friend Mikey is in town so we are going to go again tomorrow. Hopefully we will have more favorable conditions. Also, Courtney and I are taking the boat to saltwater on Dec. 8th. We intend to cruise the Outer Banks near Hatteras Lighthouse for a day, but more on that later. This will likely be Cassidy's last sail for the winter. I am busy planning my winter boat projects and am anxious to start.

Saturday, November 04, 2006

First Sail on the New Boat!


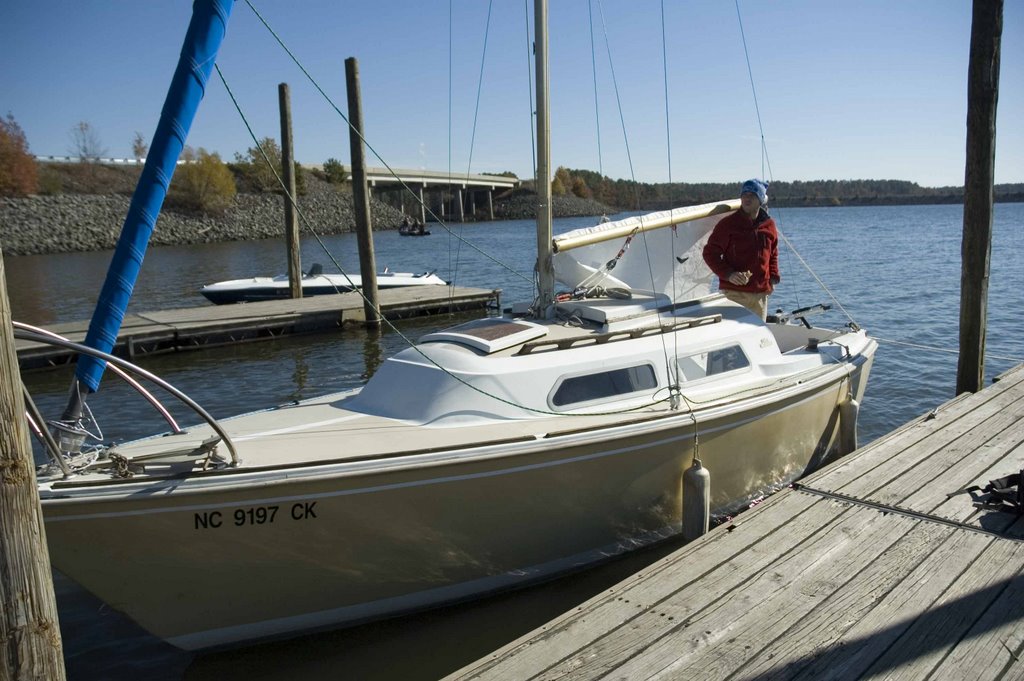
The couple who sold us the boat were nice enough to take us out on a 'training run' today. Courtney and I met them at Ebenezer Point at Jordan Lake near Wilsonville NC. It was an absolutely beautiful day for a sail, a bit chilly but not shivering cold. They walked us through the rigging process in the parking lot and then we dropped her in the drink. She floated, so the first test was passed. The motor cranked right up and we piloted her out into the wind. The wind was mild and a bit inconsistent, but I think this was probably perfect for our first time out. Bob helmed her for a tack or two and then I took control of the tiller. I got the hang of it pretty quick, but like I said, it was pretty easy going out there. We tooled around with a few tacks and a jibe and then brought her in to drop off Bob and Poem. They were great and we really appreciate them taking us out. It must be odd to drive off with your old boat in the background, but they are racing J24's now so they are still active in the sport. I think that racing fast boats appeals more to Bob who is an engineer and is thus very in tune with the physics of the boat. I hope that I understand it as well one day. So then Courtney and I got our first one on one time with the boat. It went a bit better than I expected, and way better than Courtney expected. This boat is very forgiving and comfortable. We got through six to eight tacks and got better every time. It was a bit harder going downwind, especially because the wind kept dying and changing directions. Anyway, we got her back to the dock and up on the trailer without a hitch. It took us a while to derig her, but I think that we will get much faster once we both understand what we need to do. In conclusion, a wonderful day out on the lake! My face hurts from grinning so much, and Courtney liked it a lot more than she thought she would. We can't wait to take her out again (maybe tomorrow!).